Options
Audio
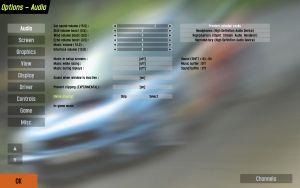
Ce menu vous permet de modifier le volume des effets sonores et de la musique.
Sons du véhicule : Controle le volume des sons de tous les véhicules en fonction de la musique et des sons de l'interface,
Boost des bruits de dérapage : Multiplie le réalisme des bruits de dérapage pour en faciliter la perception. Régler à un pour un volume réaliste.
Boost des bruits de vent : Idem que ci-dessus mais pour le vent. Remarquez que le bruit sera plus élevé pour les véhicules sans toît.
Boost des bruits d'écho : Cette option détermine le volume des effets d'écho.La valeur par défaut est réglée à 2. 0 est plus réaliste mais vous pouvez modifier l'option à votre guise..
Volume de la musique : Volume de la musique dans les menus et pendant le jeu.
Musique dans les menus de réglages : Allume ou éteint la musique pendant les réglages.
Musique pendant la course : Allume ou éteint la musique pendant la course.
Musique pendant les replays : Allume ou éteint la musique pendant les phases de replays.
Choix de la chanson : Vous pouvez choisir la chanson à jouer.
Musique in-game : LFS permet l'utilisation de listes de chansons et c'est à cet endroit que vous pourrez voir et modifier la playlist.
Canaux : Utilisez ce bouton pour entrer dans l'interface de gestion de playlist. Le canal #1 est sélectionné par défaut et ne peut être supprimé. Vous pouvez en outre ajouter, renommer et supprimer les playlists sur la partie gauche de l'écran. A droite, vous pouvez assigner une chanson pour un circuit en particulier. Vous pouvez gérer les priorités : 3 priorité haute, 1 priorité faible - pour empêcher une chanson d'être jouée. Plus une chanson sera prioritaire, plus elle aura de chance d'être jouée. Ainsi, si 2 chansons ont la même priorité, elles seront jouées aussi souvent l'une que l'autre etc.
Astuce : Les fichiers musicaux sont au format Ogg Vorbis. Vous pouvez créer votre propre musique en utilisant un logiciel d'encodage gratuit disponible ici : www.vorbis.com ou en utilisant le logiciel Audacity. Les chansons devront être copiée dans le dossier suivant : ..\Data\Ogg directory.
Affichage
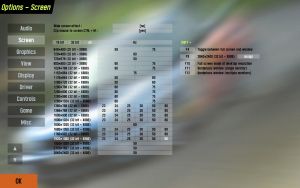
Dans ce menu, vous choisissez la résolution de l'écran, la profondeur des couleurs et le rafraîchissement. Vous pouvez assigner des combinaisons de touches pour différentes configurations d'écran.
Mode d'affichage : Cette option permet de choisir un ratio d'écran différent du 4:3 pour l'utilisation d'écrans larges..
Afficher les modes 32 bit : Vous permet de choisir des modes d'affichage 32 Bit. En standard, la couleur est en 16 Bit.
Effets d'écran large : Affiche des bandes noires en haut et en bas de l'écran pour simuler la diffusion d'un film 16/9ème sur un écran 4/3.
Coller le pointeur sur la fenêtre : Si vous jouez à LFS en mode fenêtre, il se peut que la souris quitte la fenêtre du jeu. Si vous jouez à la souris, cette option permet d'empêcher le pointeur de sortir de la fenêtre de LFS. Cette option peut être activée et désactivée en combinant les touches Ctrl+C.
Assignation des touches : Cela vous permet d'activer l'assignation des touches pour assigner des résolutions, profondeurs de couleurs et fréquences de raffraîchissement à l'une des 4 commandes Shift+F9 à Shift+F12. Choississez les réglages désirés et cliquez sur l'un des boutons sur la droite.
Options graphiques
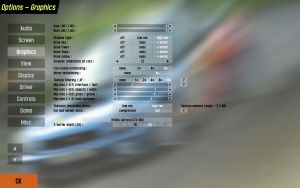
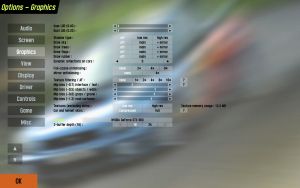
Ce panneau contient tous les réglages secrets pour la qualité des graphismes. Un réglage précis de ces options permet d'augmenter le nombre d'images par secondes (fps) ou augmenter la qualité de l'image. Le fait de désactiver certaines de ces options permettent d'améliorer grandement la qualité du jeu sur certains ordinateurs.
Niveau de Détails : Cette option règle le niveau de détails, c'est-à-dire la qualité des objets et des textures, ainsi que la distance d'affichage. Par exemple, avec un niveau de détails moindre, les pneus apparaîtront plus anguleux.
Performance : 0.25 | Qualité : 1.00
Poussière : Cette option influence la qualité de la fumée et de la poussière..
Performance: 0.25 | Qualité: 1.00
Rétroviseurs : Qualité de l'image renvoyé par les rétroviseurs.
Performance: 0.25 | Qualité: 1.00
Détails selon la largeur d'écran : Cette option indique si la résolution influence le niveau de détails de l'image. Ainsi, le niveau de détails est plus élevé si vous utilisez au moins une résolution de 1024x768.
Resolution > 1024x768 – Performance: Off | Qualité: On, Resolution < 1024x768 – Performance: On | Qualité: Off
Réduction de la qualité de la piste : Cette option peut grandement améliorer les performances : les objets invisibles ne sont plus dessinés et certains détails sont réduits. La qualité de l'image n'est pas trop affectée si bien que cette option devrait être toujours activée.
Performance: On | Qualité: Off
Vues
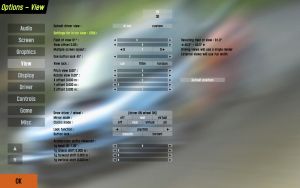
Les options contenues dans la catégorie Vues permettent d'ajuster la vision de caméra dans le jeu. On vous recommande d'ailleurs de créer vos propres réglages de caméra. .
Champ de vision : La largeur de la vue qui se présente devant vous est également appelée niveau de zoom. Un champ de vision plus étroit permet une vision rapprochée de la ligne d'horizon, cependant, vous ne verrez rien sur les côtés. Un champ de vision plus large vous permet de mieux voir ce qui se passe sur les côtés, aux prix d'une vision longitudinale plus éloignée. C'est à vous de choisir un compromis en jouant sur le curseur. La valeur est réglée par défaut à 90°.
Effets G : Ces options indiquent comment l'écran se déplacera en fonction des forces G. A zéro, la caméra restera immobile. Mais vous pouvez simuler les mouvements de têtes du pilote provoquées par les forces G latérales et longitudinales. Pour un réglage réaliste, réglez cette option entre 0 et 50 %.
Vue du pilote par défaut : Vous disposez de deux caméras statiques dans le jeu. La vue standard, la plus réaliste ou une vue personnalisée que vous pouvez placer n'importe où. J'expliquerai dans un second temps la démarche pour régler la vue personnalisée. Si vous choisissez l'une ou l'autre des deux vues, vous la sélectionnerez ainsi automatiquement comme vue au lancement du jeu. Choisissez ici votre vue préférée.
Pitch : C'est la direction verticale de la caméra. Elle peut s'orienter en haut (valeur positive) ou en bas (valeur négative).
Rotatation : La direction horizontale de la caméra. Une valeur négative pour la gauche, une valeur positive pour la droite.
Position du rétroviseur : Cette valeur ajuste la position du rétroviseur central de manière horizontale et longitudinale.
Jauges : Change le mode d'affichage des jauges et indicateurs. Off > aucun affichage, réels > les inclus dans le tableau de bord et virtuel > affichage à l'écran.
Move view with animation : This option allows you to select whether the incar camera moves along with the driver when it steers left and right, which does look realistic, but it's personal whether it should be on or off.
Draw driver / wheel: This changes what you see in the incar view. The driver with the steering wheel, only the steering wheel, or nothing at all. Some people who use a steering wheel in LFS are known to use display no steering wheel in LFS because it looks awkward seeing a steering wheel move the same as the one you are controlling.
Look function: With this option, you can set up additional ways to look left and right beside the look left and right buttons. The Axis option will move the camera left and right with an axis specified in the Controls menu. Read that to get to know how to set an axis for the axis look option. The steer option will move with your steering. Steering left will result in the camera moving left as well. This can be pretty usefull as when you steer left, you will want to go in that direction and a view looking into that direction shows more of what to come. The amount the camera looks into the steering direction can be adjusted with Look sensitivity. To find a good value for the sensitivity, steer all the way to one side and adjust the Look sensitivity to what is the maximum allowed amount of movement to one side. Ms X will move the camera left and right along with the mouse. Look sensitivity does the same as described above. Look centre reduction will alow you to define how easily the camera should stay in the forward looking position. Setting it at a high value will result in having to move the mouse alot to move it out of the forward looking position. At a low value, it will move exactly like the mouse with no centre movement reduction. Ms XY does the same except the camera moves up and down with your mouse as well, making it more adjustable.
Button look: Setting this option will define how the camera should look left and right when you press the Look left and Look right buttons specified in the Controls menu. Smooth will pan the camera gently to the side when you press the button, instant will show you the side inmediately without movement.
Setting up a custom camera
(Note: every custom camera you set up is saved per car. This way you can make a different custom camera in every car.)
Go to the View options and click on custom in the Default driver view option. Notice that new options are available now called Settings for custom view.
The Style option adjusts how the car itself is displayed. No draw shows no car at all, wheels shows only the wheels, external always shows the car wich is the most realistic and ext.2 is the same as external but it does not show the car when you look left or right with the look left and right buttons.
Clocks mode: This defines how the car's gauges and meters are displayed. Off displays nothing, Real shows them on the car's dashboard and Virtual shows them on your display.
The X offset, Y offset and Z offset, the most important settings of a custom view, define the custom camera's position. X offset moves the camera left and right, Y offset moves the camera forwards and backwards and Z offset moves the camera up and down.
Pitch view: The horizontal direction of the camera can be selected here, it can aim upwards with a positive amount, or it can aim downwards with a negative amount.
Rotate view: The vertical direction of the camera. It can aim left with a negative value or aim right with a positive value.
The mirror offsets: Adjusting these will position the front mirror horizontally (mirror offset lateral) and vertically (mirror offset vertical). Make sure it's visible as it's useful tool to notice cars behind you.
An example of a nice view in the XF GTI:
Style set to external, X offset to -0.315, Y offset to 0.547, Z offset to 0, Pitch and Rotate to 0.
When you are done setting up a custom camera, click in car again in the Default driver view option if you want the default view to be used as the standard view. Though, if you are happy with the new custom view, keep it on custom so it will always be used as the primary view.
View buttons and shortcuts
V : Switches through the cameras.
SHIFT + V : Switches back through the cameras.
TAB : Switches to the next car.
SHIFT + TAB : Switches to the previous car.
HOME : Switches to your own car.
SHIFT + F1 : Returns to the default view specified in the View options.
SHIFT + F : Removes the display showing only graphics and text messages.
SHIFT + M : Changes between mirror modes. (No mirrors, only real mirrors or real mirrors + a virtual mirror.)
SHIFT + U : Switches to the AutoX editor/Free view -mode.
Display
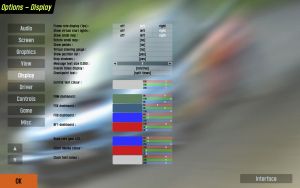
Here we can change the speedo, type of mirror used, add a map of where we are on the track.
Frame rate display: You can choose to have your rate displayed or not
Digital speedo: Yes or No toggle
Mirrors & clocks: Off means none displayed. Virtual means a virtual display on screen, not on the mirror itself or dash. Real means display where they should be, mirrors on mirrors, speedo etc. on dash.
Drop shadows: None = Off, Text = Text only, All = everything
Message size: Adjusts the text displayed in game etc, 0.70 is about the right size to start with.
Display results: Shows a transparent panel that updates and shows lap time differences etc, you can turn on or off here or toggle with Strg + Tab toggle
Overall times display: Absolute shows most recent gap time for each car compared to each other car. Relative shows the individual gap between each car relative to the lead car.
Manual shift indicator: Set to show upshifts only, downshifts only or leave to show all shifts or not display them at all.
Player
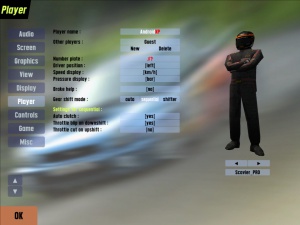
In this menu, details such as screen name, number plate text, country personalised and preferred language etc. can be added. Here you can also select your driver, Male or Female, complete with helmet and racing suit and add to your car’s cockpit. Your selected screen name will always appear next to the player button, you can also change helmet and helmet colours.
Controls
Mouse/Keyboard
Button control rate: This is for when you assign a button to an analogue control (e.g. handbrake or clutch) how fast the control moves when the button is pressed. Higher is faster.
Keyboard steer: keyboard - no help / keyboard - stabilised / mouse steer toggle. This is how you select your input method:
Mouse steer (rather obviously) lets you use the mouse for steering and assign throttle and brake to buttons (be they on your keyboard or your mouse).
Keyboard - no help directly translates button presses into wheel movement. So long as the button is held down, the wheel will continue turning until it reaches maximum lock. There is an auto return to centre function when no steering keys are pressed. Both rates are configurable. Also, pressing both left and right will hold the wheel in its current position. This steering method is definately not recommended, since it is impractically difficult to race with.
Keyboard - stabilised has two main differences to "keyboard - no help". Firstly, it limits the movement of the wheel depending on the amount of grip the tyres have. This limit is also adjustable. Secondly it adds a small amount of automatic countersteering to help balance the car. While this is a driving aid (and the turn limit can be considered one as well), it is essential for using such a basic input device for a task it obviously would never be used to do in real life. Thankfully the keyboard steering is highly configurable in LFS so you should be able to get it to work to your preference.
Auto gear shift: Yes or No toggle. If enabled, the computer will change gear for you (and probably at the wrong time too).
Mouse steer only:
Steer centre reduction: This is a non-linearity slider and is designed to make it easier to control the car buy reducing straight line twitchyness. A setting of 0.0 gives fully linear steering whereas a setting of 1.0 gives fully non-linear steering. A setting of 0.4 to 0.6 is recommended.
Keyboard steer only:
Steer rate: The speed the wheel turns when you press the left or right steer buttons. Higher values will make the car more responsive but less stable, and vice versa.
Return rate: The speed the wheel turns when you depress the left or right steer buttons. Higher values will make the car more responsive but less stable, and vice versa. It is usual to use a lower value for the return rate, between 50 to 75% of the steer rate.
Fast steer multiplier: When holding the "Steer Fast" key, the steer rate will be temporarily increased. This slider controls by what percentage it will be increased. With the default setting of 2.00, the steer rate will be doubled. This fast steering option can be useful when quick corrections are needed, such as when countersteering. Chances are you're going to crash anyway so this option is of limited helpfulness.
Slow steer multiplier: When holding the "Steer Slow" key, the steer rate will be temporarily reduced. This slider controls by what percentage it will be reduced. With the default setting of 0.50, the steer rate will be halved. This slow steering option is most useful at higher speeds when finer control over the vehicle is needed. However the keyboard steering is automatically speed sensitive, so there is really no need to ever use this anyway.
Limit multiplier: A setting of 1.0 limits the wheel turn to that of the available grip of the tyres. Settings higher than this allow you to turn further, to induce understeer. Settings lower than 1.0 means you won't get so close to the limits of the car, so control is retained. The further you reduce this setting, the easier the car will be to drive, at the sacrifice of cornering speed. (available with Keyboard - stabilised only)
In the Buttons 1 subsection you select which button to assign to the function labelled to the right of the button. To choose and lock in your selection, simply click on the button to highlight it, a text message with instructions will appear at bottom of screen, Click desired button or key you wish to associate with this button etc. Do this for all Button 1 selections, then move on to Button 2 section using the same method to select and assign your desired keys or buttons to control the views etc.
When you have completed this, mouse users and keyboard users are finished, and may want to skip the section on wheels and joysticks. And go directly to the far right of this screen and look closely at the various key sequences and what they do. i.e. (Reserved keys) and Shift + combinations.
Wheel/Joystick
This section provides different options additional to the previous section. Existing keyboard and mouse settings can still be used just by clicking on the Mouse/KB button. This is useful if your wheel breaks or springs in pedal fall apart.
After selecting to enable your wheel you will need to set it up for maximum efficiency depending on the make and whether is has force feedback functions etc some options will not be needed or may be used if desired. Please note that you might have to change some settings in the drivers of your wheel manufacturer, e.g. to enable split axes.
Steer center reduction: Adjusts the turn ratio of the users wheel to the LFS car.
Force strength: For FF users, higher settings mean more feedback. Just try what suits best to you.
Throttle/brake axis: Can be one of three different states:
Combined: The brake and throttle use the same axis
Seperate: The brake and throttle use one axis each for their settings
Button: The brake and throttle use can be assigned to a button or a paddle
Shift type: We have discussed earlier the three types and their use.
Clutch & Handbrake: Can be assigned to any spare axis or button if you wish.
Throttle/brake centre reduction: Adjusts the sensitivity of the throttle and brake and the point at which it starts to apply.
Setting up the wheel
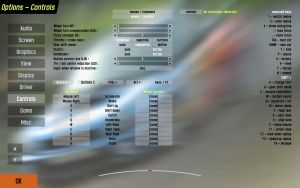
This is the area where wheel and joystick users get to assign the axis. Again most of these options are largely a click and set type button. Firstly please make sure your equipment is attached to the computer and windows has found the device and it has been set up in Control Panel / Game Controller area. Run your profiler software if needed and deselect combined axis at a windows level if needed. Calibrate using windows software before attempting to setup in LFS.
When you arrive at the controls screen shown above you be able to choose a range of options from those available to make your wheel or joystick work best with LFS. To select an axis click on the button lets start with Steer: Highlight steer and you will notice the panel available axis will light up from there you can choose which of the axes to use. The bar next to the axis will show you the range of motion of the mapped device and is used to calibrate. Highlight and select as many or as few as you wish.
For those with a force feedback controller you must enable the Force Feedback to allow any previous settings to take effect – when finished you will need to test that each axis is correct and not reversed as sometimes controllers are wired different to normal and your brake or accelerator may be on all the time. If you then choose recalibrate you can then turn the wheel or joystick left & right to determine the maximum limits and see if you have maximum settings on throttle etc. If the settings are indeed reversed use the invert button next to the selected device to reverse polarity. Have a play with these settings and you’ll soon get the hang of the controls.
For the steering wheel turns for each car, see this page
Game
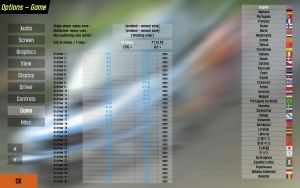
Here we set some minor options such as the automatic/manual saving of races, the finishing order for race restarts etc - We can substitute names for the AI, maybe we want to race against Peter Brock or Michael Schumacher? Just click to cycle through the available options of each selection. The most important feature however, is the ability to add to the F1 - F8 keys of your own custom messages, such as “Sorry”, Hello, etc for use when in game and too busy to type a reply etc. To do this, select the "F1 to F8" button and in the space next to the selected key, click to open, then type in your message text, click OK to save. There is a limit on length etc, but most short messages can be written.
On the right side of this page you can select the language used in LFS.
Single player replay save: Not enabled / Enabled / Auto save. Sets how replays should be handled. Not enabled means there are no replays recorded, ever. Enabled means replays are recorded, but you have to save them manually (ingame, hit "1" to save with automatically generated name, or hit "2" to save with custom name). Automatic means that every replay is saved with an automatically generated name, without requiring you to do anything.
Multiplayer replay save: See single player replay save.
Non-qualifying race restart: Sets how race (re)starts that had no prior qualifying should be handeled. The options are self explanatory.
Edit AI names / F keys:
AI names - Self explanatory.
F1 to F8 - Click on the spaces/buttons right to the desired key to define the text to say on hitting the corresponding key. The codes in there are the same as if hitting "T" (to talk) ingame.
CTRL + - Same as behaviour as in "F1 to F8", but defines the actions when hitting CTRL plus the desired key at the same time. Additionally you have access to keys F9 - F12 here.
Misc
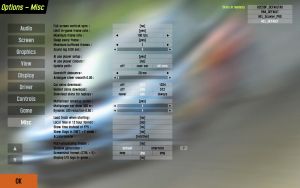
There are seventeen (17) different options here! Including some things that make a difference to game play and frame rates.
Full screen vertical sync: On/Off toggle
Limit frame rate in game: On/Off toggle, this is used in conjunction with the next option to set what max frame rate to use.
Maximum frame rate: Here you can set a minimum / maximum number of frames for use in game – depends upon the previous setting to enable/disable.
Minimum sleep: You select time value. This setting forces LFS to sleep/wait the set amount of time between each frame, to allow Windows to update controller inputs, etc. Increase this value if you're having problems with controller stuttering/lag or similar. Don't put it too high, though, as it will limit your maximum framerate.
Screen clear type: Ellipsoid and Clr+Sky are the same quality but just drawn in a different way to allow for what’s best with different cards. Usually it makes no difference but choose the one which gives the better frame rate. Plain draws no sky, which can increase your framerate on older systems.
Log messages: On/Off toggle - this option will keep a log of all the text chatter between players.
AI use player setup: Self Explanatory
AI use player colours: Self Explanatory
Sound lag: Because the program has to play the sound slightly in advance, so that there are no gaps in the sound. Recommended setting is as low as possible without hearing stutters or gaps in the sound.
Analogue steer smooth: Sets the amount of smoothing for joysticks and some wheels. The higher the value, the smoother your inputs will be, but they will also lag behind slightly.
Multiplayer speedup option: This options makes the distant cars use less cpu by not updating their physics or drawing them at all. It’s disabled when you view from the TV cameras because frame rate isn’t so important then..
Multiplayer car draw: Only visible when the above option is enabled. Sets the distance the cars are drawn. Use a lower value for increased framerates.
Dynamic LOD reduction: Sets the value for the dynamic change of "Level of Detail". Zero means no, and one is full dynamic LOD reduction. This makes the Level of Detail change dynamically depending on how many cars are visible and on your current framerate. Use higher values if you experience slowdowns when multiple cars are visible.
Update path: 3 options – Off, User car or All cars - This determines which cars update the rubber mark on the track - the racing line rubber.
Load track when starting: Yes/No toggle. If disabled, the startup time of LFS will be considerably decreased.
Local time in 12 hour format: Self Explanatory
Show time instead of FPS: Yes/No toggle. If on, the FPS display (see Options - Display) will be replaced with the local time.
